Recording loops
ARC-24 records what you play into looping parts on eight tracks (T1–T8). Only one track can be armed for recording at a time.
What you can record to
| Part | How to arm |
|---|---|
| Synth track T1–T8 | On Notes or Chords, select a track tab and tap the record arm button |
| Sample track T1–T8 | On Sampler, select a track tab and arm it — an empty track becomes a sample track automatically |
| Drum track T1–T8 | On Drums, select a track tab and arm it — an empty track becomes a drum track automatically |
A track's instrument (synth, sample, or drums) is set automatically by what you record on it — there's no switch to flip. A track stays its recorded type until you clear its loop. Tapping a track that already holds recordings switches the performance screen to that track's instrument, so the pads always match.

How to record
- Arm the track or drums you want to record
- Press Play (turn on preroll if you want a count-in)
- Play the pads
- Your performance is captured into the loop
- Stop playback when you're done (optional — you can keep recording while the loop plays)
Recording only works when all of these are true:
- Playback is running
- Something is armed
- You're not playing an arrangement or exporting
- The count-in has finished (if preroll is on)
Layering parts (overdubbing)
Leave earlier tracks disarmed and arm a different track to add layers.
Example:
- Record chords on T1
- Turn off arm on T1, or arm T2 instead
- Press Play again — T1 plays back while T2 records
Drums are tracks too — you can layer multiple drum tracks (each with its own kit) alongside synth and sample tracks.
Quantize
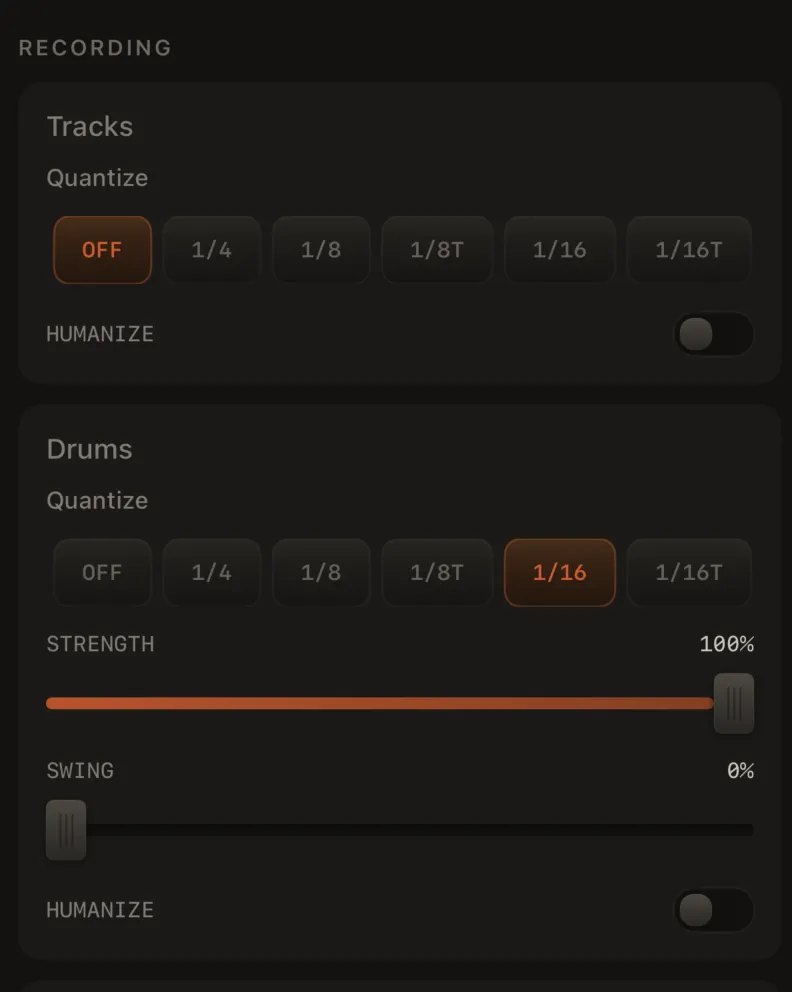
Quantize pulls recorded notes toward a steady grid when the loop plays back (and when you export). You can change quantize settings later — your original timing is kept behind the scenes.
Set quantize per track in the track's settings pane: Sound Design → Track → Recording.
| Setting | What it does |
|---|---|
| Grid | Off, 1/4, 1/8, 1/8T, 1/16, 1/16T, 1/32 |
| Strength | How strongly notes snap to the grid (0 = none, 100% = full snap) |
| Swing | Adds a shuffle feel |
Defaults: synth and sample tracks start with quantize off (expressive timing preserved). A track that becomes a drum track turns quantize on automatically — 1/16 grid at 100% — so drum hits lock to the beat out of the box. You can change either anytime.
Humanize
Humanize adds small random changes to timing and loudness on playback so loops feel less mechanical. Turn it on per track in the same Recording section (Sound Design → Track).
You can switch humanize on or off anytime without losing your original recording.
Undo
Tap Undo in the control bar:
- First restores anything you erased (one hit at a time)
- Then undoes your last recording pass on the armed track
Each track has its own undo history for recording.
Auto-save
- Your song saves automatically after your first recording
- Further changes save on their own after you pause editing
- Mixer changes to the current loop are saved the same way
You can also save anytime from the song list.
Bluetooth headphones
Recording over Bluetooth can make hits land late in the loop. The app shows a warning when you start loop recording over Bluetooth. You can dismiss it for the session or check Don't show again to hide it permanently.
For tighter timing:
- Use wired headphones or the built-in speaker
- Adjust Record Offset in Setup
See Troubleshooting → Bluetooth.
Sampler recording
On the Sampler screen, select a track tab and arm it — an empty track auto-types to a sample track. Pad hits record onto that track's loop — same arm/play rules as synth tracks.
- Sample files are song-wide; recordings are per loop on the armed track
- Keys mode stores pad index + root so playback pitch matches what you played
- Speed / Length (Set Root row) is how Keys pitches the source — Length keeps the sample's duration; Speed is tape-style. Saved per track with the loop
- To record a new sample from the mic, use Edit → tap a pad → Record. That screen has its own metronome icon (off by default) — same click and song tempo as the timeline, only while the take is running. Headphones keep the click out of the file
- See Sampler for import, Keys, Speed / Length, and the record metronome
Hold mode while recording
With Hold on in Notes mode, each tap that latches a note on or off can be recorded as note-on / note-off on the armed track (same as normal playing). See Hold mode.
What never gets recorded
- Preview keyboard in Sound Design
- Preview pads on drum sound-design cards and the mini pad preview on the sampler pad settings sheet
- ARP after one loop cycle when you're recording (it stops so the loop doesn't double up)
- Erase gestures (they remove notes instead)
- Pad input during arrangement playback or export